Installing a metal plank ceiling can greatly improve your commercial space. It adds durability and a professional look. This guide will help you through each step of setting up a suspended ceiling system that meets all the standards.
Whether you’re updating an office, retail store, or warehouse, knowing about hook-on ceiling panels is key. It helps you make informed choices for your project.
MetalWorks® Plank is a modern choice for commercial ceiling installation. These panels are made of galvanized steel with powder-coated finishes. They resist damage and dirt well. You can choose from two sizes: 16″ x 72″ and 16″ x 96″. You also have the option of microperforated or unperforated panels, depending on your needs.
A metal plank ceiling has many benefits over traditional drop ceilings. The panels attach directly to a suspension system using hook-on technology. This method makes installation quicker and gives a cleaner look. Your ceiling will look sleek and provide easy access to systems above.
This guide will give you the knowledge you need to succeed. You’ll learn how to plan, install, and maintain your ceiling. By following these steps, you’ll get professional results that meet all the commercial building codes and requirements.
Key Takeaways
- Metal plank ceiling systems use galvanized steel panels with durable powder-coated finishes
- Hook-on ceiling panels come in 16″ x 72″ and 16″ x 96″ sizes for flexible design options
- Commercial ceiling installation requires proper planning and assessment of your existing space
- A suspended ceiling system provides quick installation and easy access to overhead building systems
- Understanding panel perforation options helps you balance acoustics with visual appearance
- Professional installation meets commercial building standards and codes for your project
Understanding Metal Plank Ceiling Systems and Their Applications
Metal plank ceilings are a modern choice for stylish and strong spaces. They are favored by building managers and architects in the U.S. These ceilings are reliable and need little upkeep over the years.
These ceilings are made with top-notch materials and smart design. They often use galvanized steel panels that don’t rust and keep their look. The powder-coated finish also protects against scratches and stains, keeping your ceiling looking great for a long time.
What Makes Metal Plank Ceilings Ideal for Commercial Spaces
Commercial areas face special challenges. They need ceilings that can handle a lot of traffic and easy access. Metal plank ceilings are perfect because they last long without getting damaged.
Places like offices, retail stores, transit stations, and institutions benefit from metal ceilings. They are easy to clean and keep looking professional without needing constant repairs. This saves you money and time.
Another big plus is fire safety. These panels meet strict fire codes, keeping your building safe. They also meet standards that protect people and property.
Key Components of Hook-On Panel Systems
Knowing how your ceiling works helps with installation and upkeep. Hook-on panel systems have two main parts: the panels and the suspension framework.
| Component | Function | Material Options |
|---|---|---|
| Metal Panels | Primary visible surface that defines acoustics and appearance | Microperforated or solid galvanized steel with powder-coated finish |
| Hook-On Cross Tees | Suspended support structure that holds individual panels securely | Galvanized steel with specialized hook mechanisms |
| Drywall Mains | Primary grid framework supporting the entire system | Standard metal channels adapted for panel support |
The hook-on cross tees connect to drywall mains, forming a support structure for panels. This setup lets you take out panels without messing up the rest. It’s also great for accessing areas above the ceiling for maintenance without a big hassle.
Microperforated panels are good for sound control while keeping the ceiling strong. You can choose between these and solid panels based on your sound needs. Both options are built with durable galvanized steel and a powder-coated finish.
Essential Tools and Materials for Metal Ceiling Installation
Starting your metal ceiling installation right means having the right tools ready. You need to have everything on-site to avoid delays. The right equipment makes the job smooth and efficient.
Measuring tools are key to this project. You’ll need a tape measure, chalk lines, and a long carpenter’s level. A magnetic level is great for metal components. These tools help you get the ceiling height and layout right before you start.
Safety equipment is vital for your protection. Safety glasses protect your eyes from debris. Heavy-duty gloves are needed because metal edges are sharp. Wire cutting pliers are for handling hanger wire, which holds the grid system.
There are different cutting tools for various needs. Tin snips are good for grid components and small pieces. A band saw with fine blades is best for border panels. Electric shears are a portable option for quick cuts. Duct snips or aviation snips are for small cuts and notches.
| Cutting Tool | Best Use | Speed | Portability |
|---|---|---|---|
| Band saw | Border panels and large cuts | Fastest | Stationary |
| Electric shears | Multiple border panels | Fast | Portable |
| Tin snips | Grid components | Moderate | Very portable |
| Aviation snips | Notching and penetrations | Slow | Very portable |
Your material list includes drywall mains, hook-on cross tees, and hanger wire. You’ll also need perimeter trim and pressure springs. Having all materials delivered before starting keeps your crew working smoothly.
Pre-Installation Planning and Site Assessment
Before you start installing your metal plank ceiling, planning is key. This step helps avoid delays and ensures a smooth project. You’ll need to understand your space, spot challenges, and plan your installation.
Evaluating Existing Ceiling Structure and Obstructions
First, check your ceiling structure. Use a stud finder to find joist locations. Mark these spots with chalk lines. This is important because your hanger wires will attach here.
Then, assess your room for obstructions. Look for things like HVAC ducts and electrical conduits. Make sure to plan around light fixtures and other ceiling equipment. This avoids problems during installation.
Determining Ceiling Height and Layout Requirements
Figuring out your ceiling height is important. You need at least 3 inches of clearance for traditional hanger wire. QuickHang grid hooks need only 2.5 inches. Remember, recessed lighting and other fixtures may need more space.
Start planning your layout by measuring your room. Record the length and width to the nearest inch. Use formulas to figure out your border sizes. This makes your ceiling look professional.
| Measurement Type | Purpose | Typical Spacing |
|---|---|---|
| Joist Location Identification | Determines hanger wire attachment points | 16″ or 24″ on center |
| Obstruction Mapping | Identifies conflicts for grid placement | As needed per space |
| Ceiling Height Verification | Ensures adequate clearance for system | 3″ minimum (wire) or 2.5″ (QuickHang) |
| Border Panel Dimensions | Creates balanced visual appearance | Equal on opposite walls |
Make a reflected ceiling plan to show main beam locations. Use 4 feet on center for your beams. Your cross tees should match your panel length. This planning helps avoid mistakes and saves materials.
Preparing Your Workspace for Safe Installation
Before starting your metal plank ceiling installation, make sure your workspace is safe and organized. A well-prepared area ensures a high-quality ceiling and keeps everyone safe. A clean, clutter-free space prevents accidents and damage to materials.
Start by removing all furniture, equipment, and debris from the area. Clear a wide space around your work zone for easy movement and equipment setup. This setup is key for safe overhead work.
Ladder safety is very important. Your ladder should be stable and allow you to work comfortably without stretching. Move your ladder often to avoid reaching too far. Good lighting is also essential for seeing grid alignment and panel placement clearly.
Keep your materials organized and within reach but not in the way. Panels, grid components, and tools should be neat and easy to access. Before starting, let panels acclimate for 24 hours. This helps them adjust to your building’s temperature and humidity, preventing warping.
Make sure your installation area meets the product warranty’s temperature and humidity requirements. Never install panels in extreme conditions. Keep your hands clean to avoid smudges on the finished panels.
| Pre-Installation Preparation Task | Purpose | Timeline |
|---|---|---|
| Clear workspace of obstructions | Prevent trips, falls, and material damage | Before work begins |
| Verify ladder stability and placement | Ensure ceiling installation safety and worker protection | Before each work session |
| Remove panels from cartons | Begin panel acclimation process | 24 hours before installation |
| Check temperature and humidity levels | Meet warranty temperature requirements and material specifications | Before installation begins |
| Organize material storage areas | Keep tools and components accessible and protected | Before installation begins |
| Set up adequate lighting | Ensure clear visibility for grid alignment and panel positioning | Before installation begins |
Never install ceiling panels under an existing ceiling with radiant-heat coils. The heat can damage panels and void your warranty. Also, keep clear air space above the panels for ventilation and performance.
Good workspace preparation is key to a successful metal plank ceiling installation. It ensures safety, efficiency, and a great finish for your project.
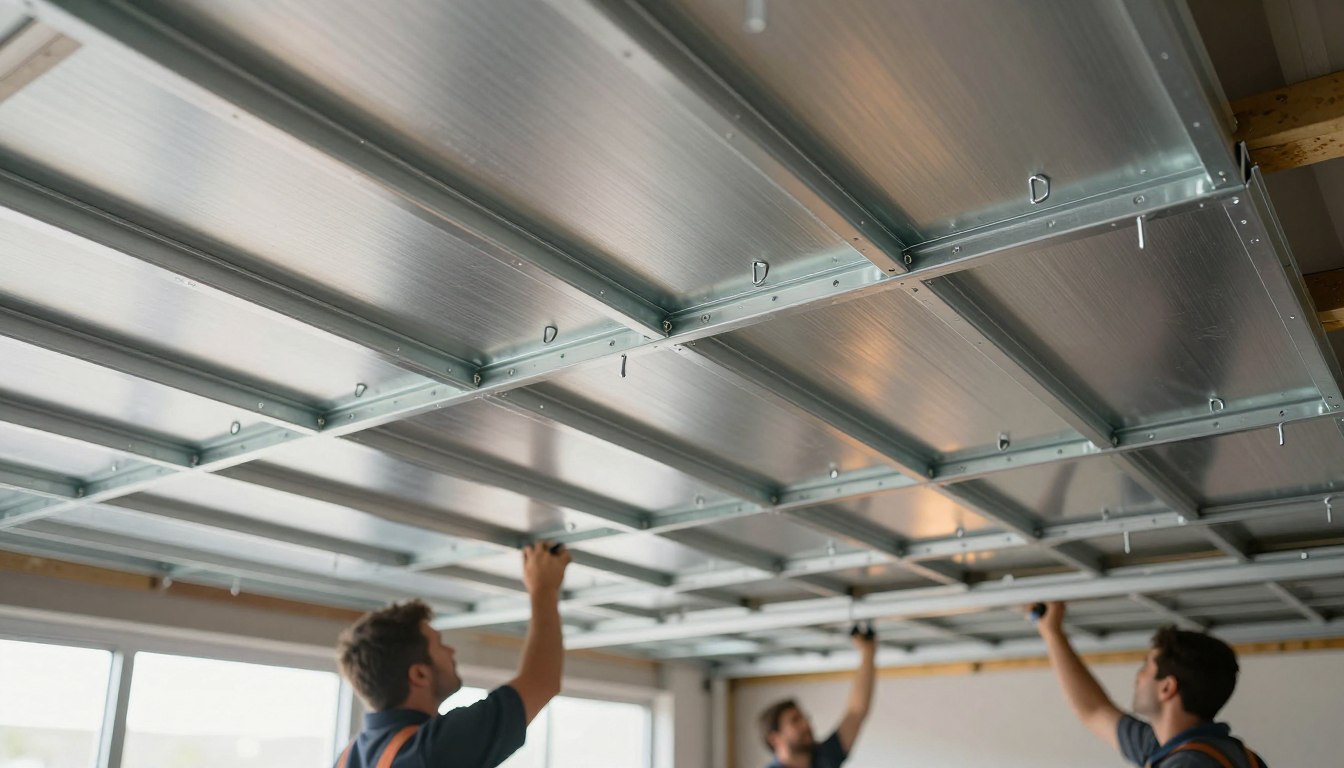
Installing the Suspension System and Grid Framework
The suspension system is key to your metal plank ceiling project. It ensures your grid framework stays level and secure for years. Success comes from precise measurements, proper wire placement, and attention to detail.
Start by marking your ceiling height on the wall with a pencil. Add the molding height to this mark. Use a carpenter’s level to draw a line around three walls. For the fourth wall, stretch a string line at the right elevation for accuracy.
Securing Drywall Mains and Hanger Wire Placement
Install your wall molding by fastening it to wall studs. Use screws for wood studs and anchors for concrete or masonry.
Find your ceiling joists and install hanger wire fasteners at 4-foot intervals. Attach 12-gauge hanger wire to each fastener by wrapping it three times. Pre-bend the wires to the ceiling height by bending them 90 degrees where they meet a string line.
Install your drywall mains perpendicular to the joists at 4-foot spacing. Use hanger wire spaced no more than 4 feet along each main. Thread the wire through the mains and wrap it three times for support.
| Component | Item Number | Spacing Requirement | Installation Notes |
|---|---|---|---|
| Standard Drywall Mains | HD8906 | 4 feet on center | Installed perpendicular to joists; hanger wire spacing maximum 4 feet |
| Hanger Wire (12-gauge) | N/A | 4 feet maximum intervals | Wrapped around itself 3 times; pre-bent to ceiling height |
| BERC2 Clip | N/A | At wall intersections | Clips onto main ends; snaps onto wall molding; pinned with screws |
Trim your main ends at wall locations and attach them to the molding using BERC2 clips. These clips snap onto the molding and secure with screws.
Positioning Hook-On Cross Tees for Panel Support
Install hook-on cross tees in rows to match your panel lengths. Make sure the open side of the hook faces the same direction. Inconsistent orientation can cause problems.
Trim cross tees at walls by cutting 1.5 inches from each end. If a cut end lacks a rivet, add a screw for reinforcement. Attach the trimmed cross tees to the molding using BERC2 clips. Your grid framework is now ready for metal plank panels.
Metal Plank Ceiling Panel Installation Techniques
Installing metal plank panels needs a good hook-on panel technique for a pro finish. Start by placing full-size panels away from walls to set a pattern. This method helps you cut border pieces accurately.
Each panel has a long and short hook end. These work together to secure the panel in place, making it look neat and even.
Begin by placing the long hook end over the next panel. Then, put the short hook end on the cross tee until you hear a click. This means the panel is in the right spot.
To keep rows straight, use a string line along the area. Align each panel’s edge with this line as you move across. This ensures your ceiling looks great and meets standards.
The gasket spacing on panels is important. Each plank has a 1/8-inch foam gasket on two sides. These gaps allow for easy access later without harming other panels.
These gaps are not just for looks. They make maintenance and repairs simpler. When you need to access a panel, just lift the long hook end. Then, tilt and remove the panel through the grid framework.
Be gentle with panels to avoid scratching the powder-coated finish. Work with clean hands and don’t slide panels together. This method adds beauty and makes maintenance easy, perfect for commercial spaces.
Installing Perimeter Trims and Wall Moldings
The final step in finishing your metal plank ceiling is installing perimeter trims. This step makes your ceiling look polished and professional. You need to finish the edges properly, whether your ceiling meets a wall or floats freely.
Choosing the right trim style changes how your ceiling looks. If your ceiling meets a wall, use aluminum trim for a finished edge. Suppliers like building materials suppliers offer aluminum panels that work well with these trims. You can pick from F-channel molding, shadow F molding, or C-channel trim for different looks.
Attaching F-Channel and C-Channel Trim Options
F-channel molding gives a classic look where the panel face rests on the flange. It’s great for most commercial spaces. Shadow F molding creates a sleek, floating effect. C-channel trim offers a modern look with minimal visible trim.
For ceilings that don’t touch walls, use a special extruded aluminum trim. This trim attaches to your grid with clips. Cut it to length and miter the corners for clean joints. Use splice plates to connect sections smoothly.
Using Pressure Springs for Border Panel Retention
Pressure springs are key for keeping border panels in place. Insert them into grooves in the perimeter trim. Use one spring per linear foot of panel edge. This keeps panels in contact with the trim without fasteners.
With C-channel trim, the spreader channel supports the panels behind the edges. It keeps everything aligned and stable. Your installation will look professional and stay secure for years.
Cutting and Customizing Metal Panels for Border Areas
Cutting metal panels needs careful planning and the right tools. Your choice of equipment depends on the cuts needed and your budget. Knowing which tool is best for each job helps you get clean, professional results while saving money.
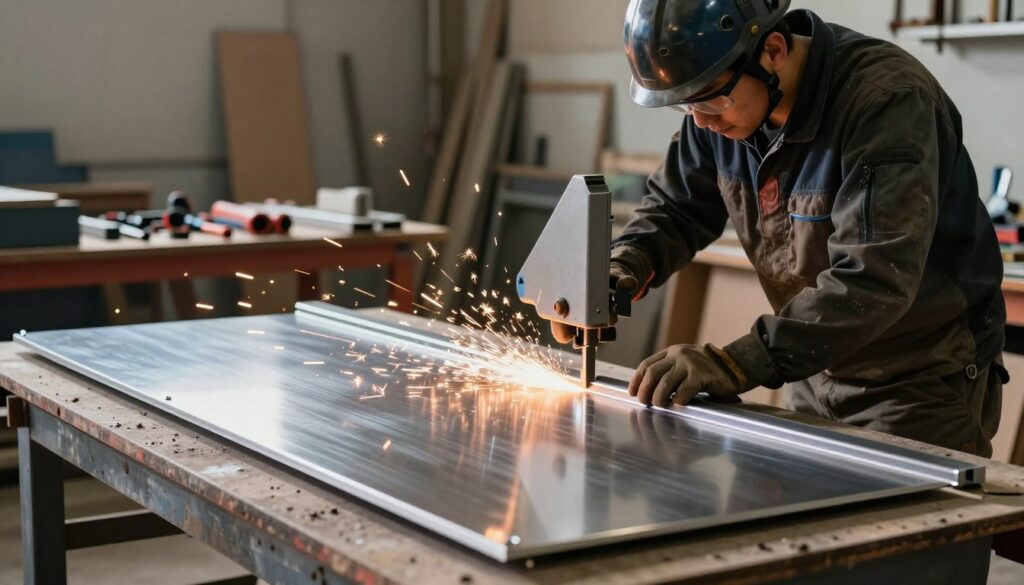
A band saw with a fine-toothed blade is the fastest way to cut metal panels. Use a blade with 14 to 18 teeth per inch and a throat depth of at least 12 inches. Mark your cut line on the panel face using a straightedge. Feed the panel face-up through the saw for clean, accurate cuts.
Electric shears are a portable option for panel customization. These tools remove a quarter-inch wide strip of material as they cut. Before using electric shears, remove a small section of edge material on the waste side of your cut line. This creates access for the shear blades. Always cut panels face-up and direct the waste coil away from your finished surface.
Aviation snips are best for notching and penetration cutting around obstacles like pipes and sprinkler heads. You need both left-cut and right-cut versions for complete flexibility. For penetration cutting, drill a starter hole near the center of your cutout area, then spiral outward to your finished dimension.
| Cutting Tool | Best Use | Speed | Cost Range |
|---|---|---|---|
| Band Saw | High-volume cutting | Fastest | $500+ |
| Electric Shears | Medium cuts | Fast | $180–$220 |
| Aviation Snips | Notching and penetrations | Moderate | $10–$15 per pair |
| Duct Snips | Light-duty cuts | Slow | $15–$25 |
Safety is key when cutting metal panels. Cut edges are razor-sharp and can cause serious injuries. Always wear safety glasses to protect your eyes from metal fragments. Heavy-duty work gloves protect your hands from sharp edges during border panel cutting and handling.
Mark all cut lines clearly on the panel face before starting. Measure twice and cut once—metal panels cannot be repaired if you make mistakes. Your border panels need precise dimensions to ensure equal borders on opposite walls for a professional appearance that completes your metal ceiling installation.
Seismic Installation Requirements for High-Risk Zones
Building in earthquake-prone areas requires extra care for your metal plank ceiling system. If your project is in IBC Seismic Design Categories D, E, or F, you must follow specific steps. This ensures your ceiling stays secure during seismic events.
These zones face severe seismic activity. Reinforcing your grid structure is key for safety and code compliance.
Your seismic ceiling installation needs extra grid reinforcement. This protects your ceiling panels from shifting or falling during ground movement. Proper installation prevents costly damage and ensures occupant safety when earthquakes hit.
Installing Seismic Springs and Grid Reinforcement
Begin by adding extra rows of standard drywall cross tees between your existing rows. For 72-inch panels, space these tees at 3-foot centers. For 96-inch panels, use 4-foot centers. This denser grid pattern prevents excessive movement during seismic events.
At the perimeter walls, anchor one end of each main beam row and cross tee row. Replace your standard BERC2 clips with pop-rivets or insert screws. This creates fixed connection points that secure your grid to the building structure. The opposite ends must remain flexible—cut them 3/4 inch short of the wall so they slide freely within their clips during ground movement.
Install seismic springs at each panel location as your final step. These springs allow panels to move independently from the grid while staying in place. Turn each spring clockwise until it locks into the grooves formed in your hook-on tee. One spring per panel ensures proper energy distribution during seismic activity.
| Panel Size | Cross Tee Spacing | Component Type | Installation Method | Quantity Per Panel |
|---|---|---|---|---|
| 72-inch panels | 3-foot centers | Standard drywall cross tees | Between hook-on tee rows | Additional rows as needed |
| 96-inch panels | 4-foot centers | Standard drywall cross tees | Between hook-on tee rows | Additional rows as needed |
| All sizes | Perimeter anchoring | Pop-rivets or screws | One end fixed to wall molding | One per main and tee row |
| All sizes | Opposite end | BERC2 clips | Cut 3/4 inch short, free-sliding | One per main and tee row |
| All sizes | Panel support | Seismic springs (item #5337) | Turn clockwise to lock in grooves | One per panel |
Understanding seismic design categories and their specific requirements helps you meet IBC seismic requirements. Different zones need different reinforcement levels. Always check your local building codes before starting installation. Your inspector will ensure all components match the seismic design category for your location.
The combination of grid reinforcement, fixed perimeter connections, and individual seismic springs creates a reliable earthquake-resistant ceiling system. Your careful attention to these details protects your building, its occupants, and your investment in quality construction.
Fire Safety and Low VOC Compliance Considerations
Your metal plank ceiling installation must meet strict fire safety standards. It also needs to help create a healthy indoor environment. Metal ceiling panels made from galvanized steel or aluminum are non-combustible. This means they won’t catch fire or spread flames.
Building code compliance is a must when installing metal ceilings. You must check that your installation meets local fire codes. This might include using fire-rated insulation or grid components in certain areas. High-occupancy spaces like schools and hospitals have stricter rules.
For indoor air quality, choose low VOC materials for your installation. While metal panels themselves are low in VOCs, adhesives and coatings should also be low VOC. This helps keep the air clean and supports green building goals.
Keep records of all material certifications, VOC test reports, and fire ratings. This is for your project architect or sustainability consultant. Metal ceiling systems are recyclable, supporting sustainable construction. At the end of their life, they can be recycled instead of thrown away.
| Compliance Requirement | Purpose | Application Areas |
|---|---|---|
| Fire-Resistant Ceiling Materials | Prevent fire spread and protect occupants | Schools, hospitals, offices, assembly areas |
| Non-Combustible Grid Components | Maintain fire safety integrity throughout system | High-occupancy commercial spaces |
| Low VOC Adhesives and Coatings | Improve indoor air quality and reduce emissions | All interior ceiling installations |
| Fire-Rated Insulation | Enhance fire safety compliance above ceiling plane | Spaces requiring enhanced fire protection |
| Material Certifications Documentation | Verify compliance with building codes | All projects for architect and inspector review |
Choosing a non-combustible ceiling system shows you care about safety and the environment. Metal ceiling installations with fire safety and low VOC products make spaces safe and healthy.
Maintenance Access and Long-Term Performance Strategies
Your metal plank ceiling system needs careful planning for service access and long-term performance. The hook-on panel design makes it easy to reach mechanical systems and electrical components above your ceiling. This planning helps your maintenance staff access these areas without damaging panels or disrupting work.
Removing panels is simple once you know how. Just raise the long hook end of an adjacent panel, disengage the short hook, then tilt and remove the panel. This method keeps your investment safe by avoiding damage to surrounding materials.
Creating Accessible Panels for Future Service Needs
First, identify which panels need frequent access for maintenance and service. Mark panels above air handlers, valve assemblies, and electrical junction boxes. Create an access panel map for your staff to avoid confusion.
Keep detailed records of your installation, including grid layout and panel dimensions. This info helps when you need to replace panels. Record manufacturer details, model numbers, and color codes for future orders.
Supporting Long-Term Ceiling Performance
Metal panels with powder-coated finishes resist soiling and need little maintenance. Clean them with mild detergent and water, avoiding abrasive cleaners. Proper ventilation in plenum spaces prevents condensation that affects appearance.
Plan service access to match equipment maintenance schedules. This minimizes downtime and disruption. Your ceiling’s long-term performance depends on ventilation, documented specs, and scheduled maintenance.
| Maintenance Task | Frequency | Access Panel Type | Tools Required |
|---|---|---|---|
| Visual Inspection | Quarterly | Standard Panels | Ladder, Flashlight |
| Filter Replacement | Every 3 Months | HVAC Access Panels | Ladder, Replacement Filters |
| Duct Cleaning | Annually | Multiple Access Panels | Ladder, Cleaning Equipment |
| Electrical Inspection | Annually | Junction Box Panels | Ladder, Testing Tools |
| Panel Cleaning | Semi-Annually | All Visible Panels | Mild Soap, Soft Cloth |
When damage happens, buying individual replacement panels is better than dismantling sections. This is very helpful in commercial settings where downtime costs money. Your ceiling maintenance access planning ensures smooth operations and protects your business from unnecessary interruptions.
Conclusion
You now know how to install metal plank ceilings professionally. You’ve learned about every step, from checking the site to planning for upkeep. This knowledge helps you make ceilings that look good and last long.
Metal plank ceilings do more than just look nice. They’re durable, easy to maintain, and add value to buildings. By following this guide, you make sure your ceiling works well and meets high standards. Paying attention to details in setup and finishing makes your work last longer.
You’re ready to handle different commercial projects now. You can install ceilings in offices, stores, or schools. Your skills show you’re dedicated to quality and following building codes.
Metal plank ceilings are a big investment in a building’s quality. Your expert installation makes sure this investment pays off. You’re now ready to take on big projects with confidence and meet the ceiling industry’s top standards.